No homework this weekend so I had a lot of spare time to work on prowl project.
Found a plastic supplier online that ships acrylic sheets of solid colors both black and white in various thicknesses and sizes, at a decent price too.
Decided to reconstruct new back assembly, the original one was too wide and bulky with doors attached. I don't want to be limited going through doorways and such.
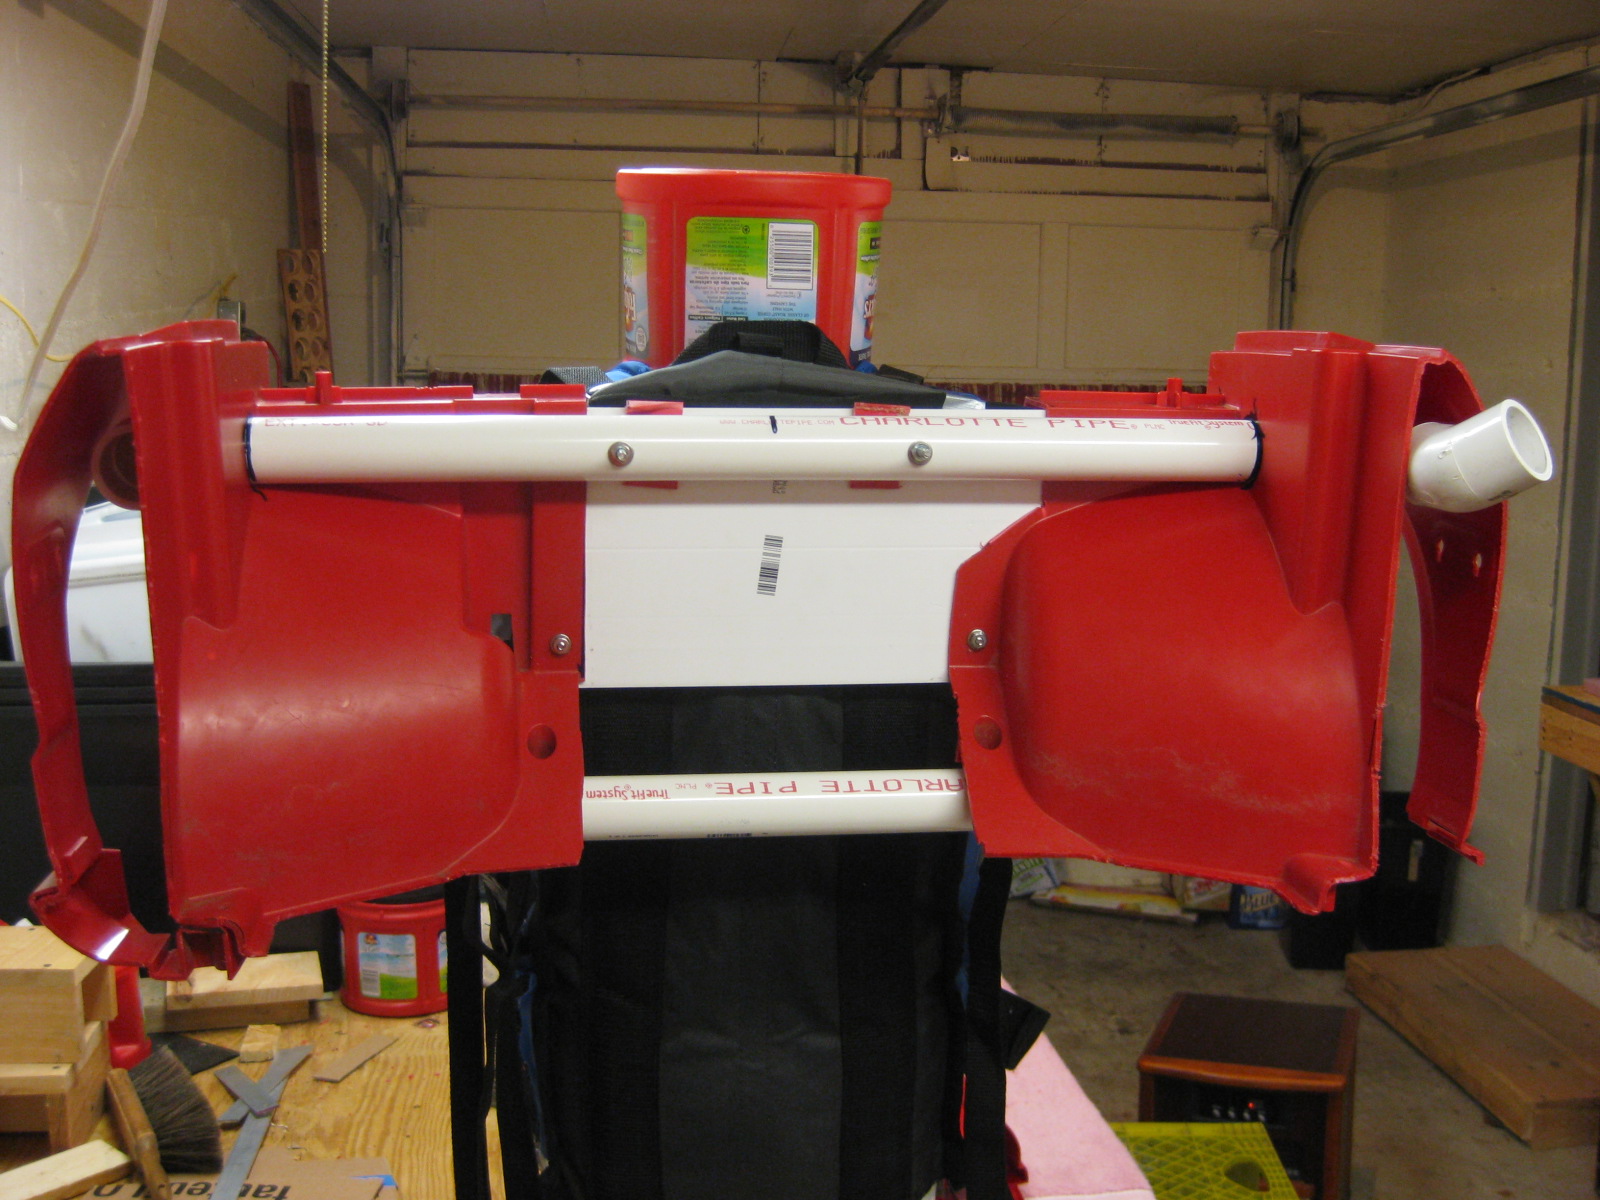
New back assembly with PVC joints for doors, inserted photo of original for comparison.
Front plates for abdomen/stomach, used two-piece rivets with 1-inch nylon strap for movement flexibility
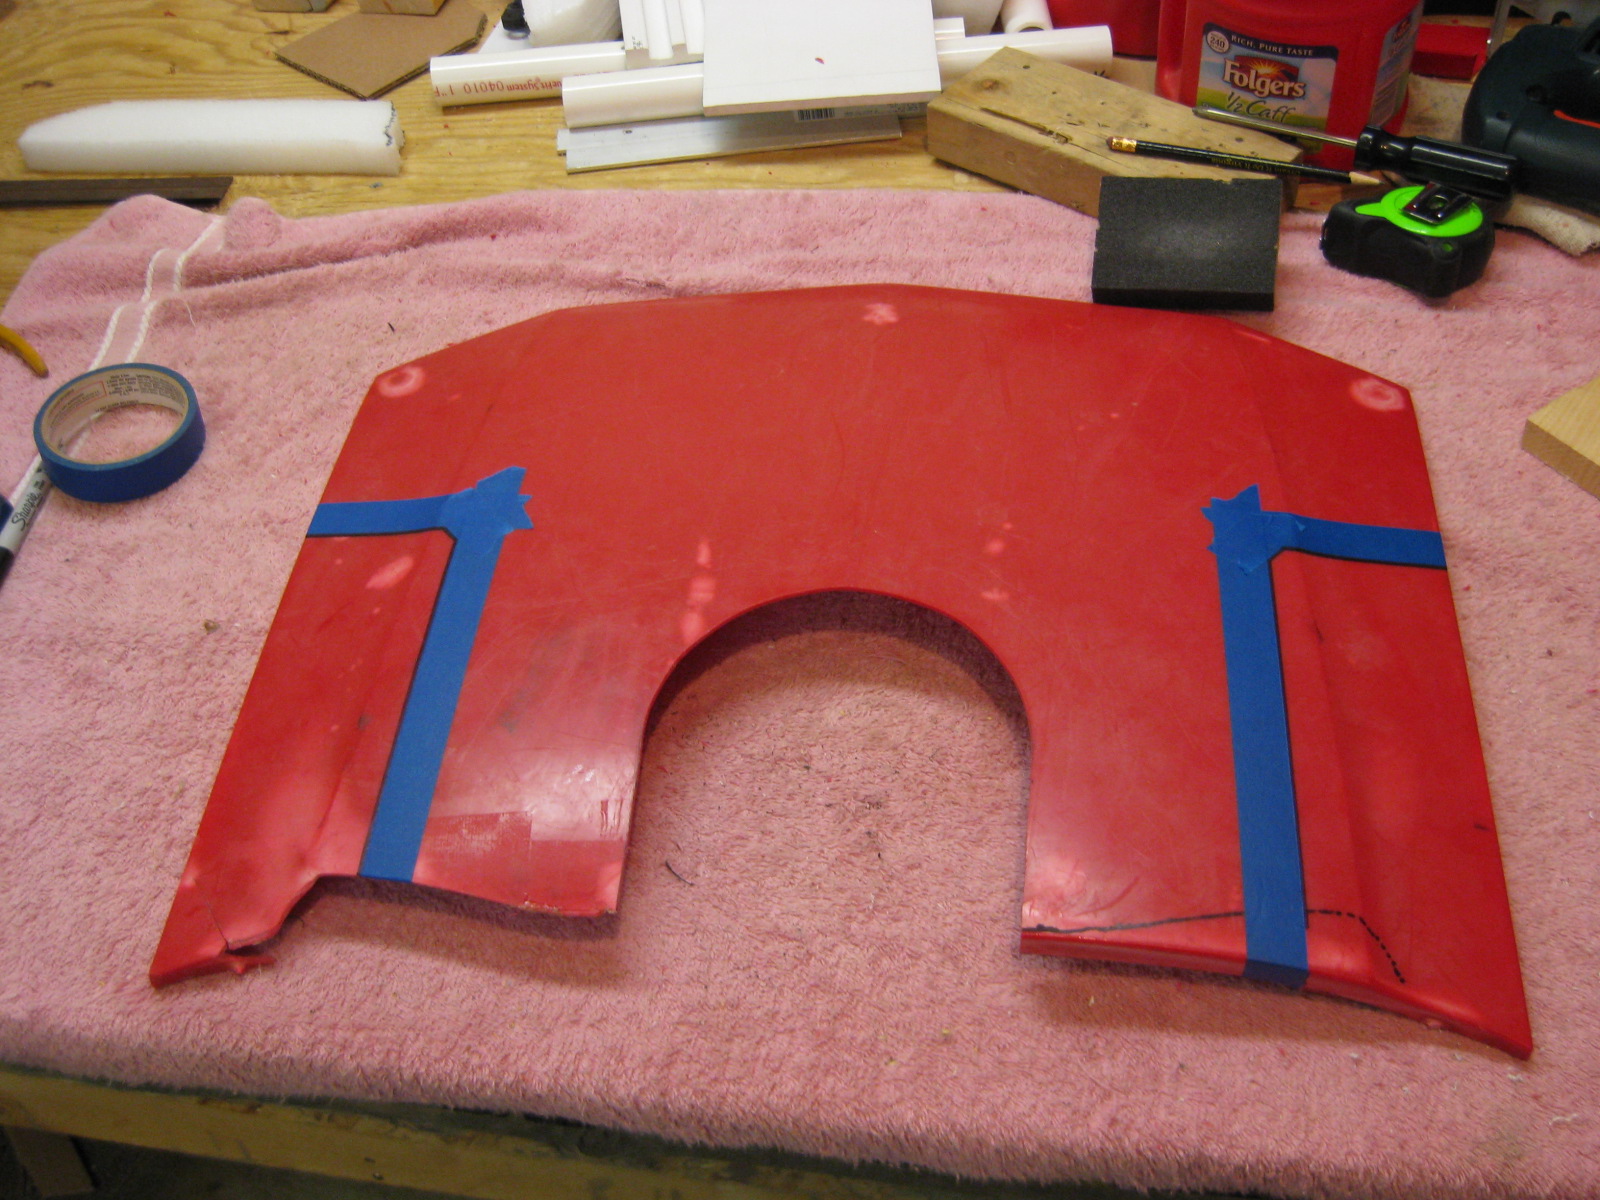
Marked areas on hood for shoulder cut-outs.
I sometimes get second thoughts about making certain cuts that can't be undone, so I made sure the cuts on hood were what I wanted and measured correctly.
Primer grey belt sections and battery box.
I can't wait to start primer grey and painting major sections, getting tired of the red.
Inside shrouds for front grill assembly, cut the material pieces out of black plastic storage bins.
Light weight, thin and easy to cut to shape, I used cardboard templates first.
Just found this awesome print of Prowl and Megatron for latest IDW Transformers ongoing comic Robots is Disguise #14 cover art.
I will definitely consider modifying helmet some amount after seeing this variant of Prowl.
Worked on helmet tonight for about 3 hours. Started getting tired when doing details around eyes. Still have another block of clay if needed. Might make helmet neck base wider. When done I will do a final finish with a wet flat trowel tool for smooth edges.
Portrait of Prowl head that I will be designing my helmet after. The red forehead wing will be added later after cast is made with standard vinyl or acrylic plastic cut to fit.
This mannequin head I found in SD at an old downtown apartment rooftop. This will be used to sculpt a helmet from layers of modeling clay.
After that I will make a mold of the helmet and then create a cast helmet from the mold. I had to construct a sturdy base that allowed the head to sit level from its original crooked position.
The white helmet will be a guide for the curvature of final model helmet. Found the white helmet on craigslist.
This past weekend allowed time to work on back section of harness. The backpack harness came with aluminum convex strips sewn into material for support. These strips are how I am attaching everything together with machine screws and other aluminum brackets.
Eventually the back section will enclose the battery bracket and have windshield/dash attach over battery. So far overall weight is approximately 10 lbs. Battery will probably add about 5 to 10 more.
One inch PVC pipe will be more than sturdy enough to support and hold back assembly together.
My initial idea for doors to attach was using aluminum one inch strips and then bent to desired angle. With PVC couplings I can get any angle I want and have a design that's able to remove doors with ease for transport and/or storage.
You can see in this photo how much the doors weight down the back assembly slightly, might have to adjust to compensate.
I did manage to piece together a rough idea of how the waist belt will roughly look like. I will try to have the waist belt look similar to the original toy.
Glued together a bracket that connects underneath the front grill. Eventually I will fasten a foam pad where this bracket rests against the abdomen area.