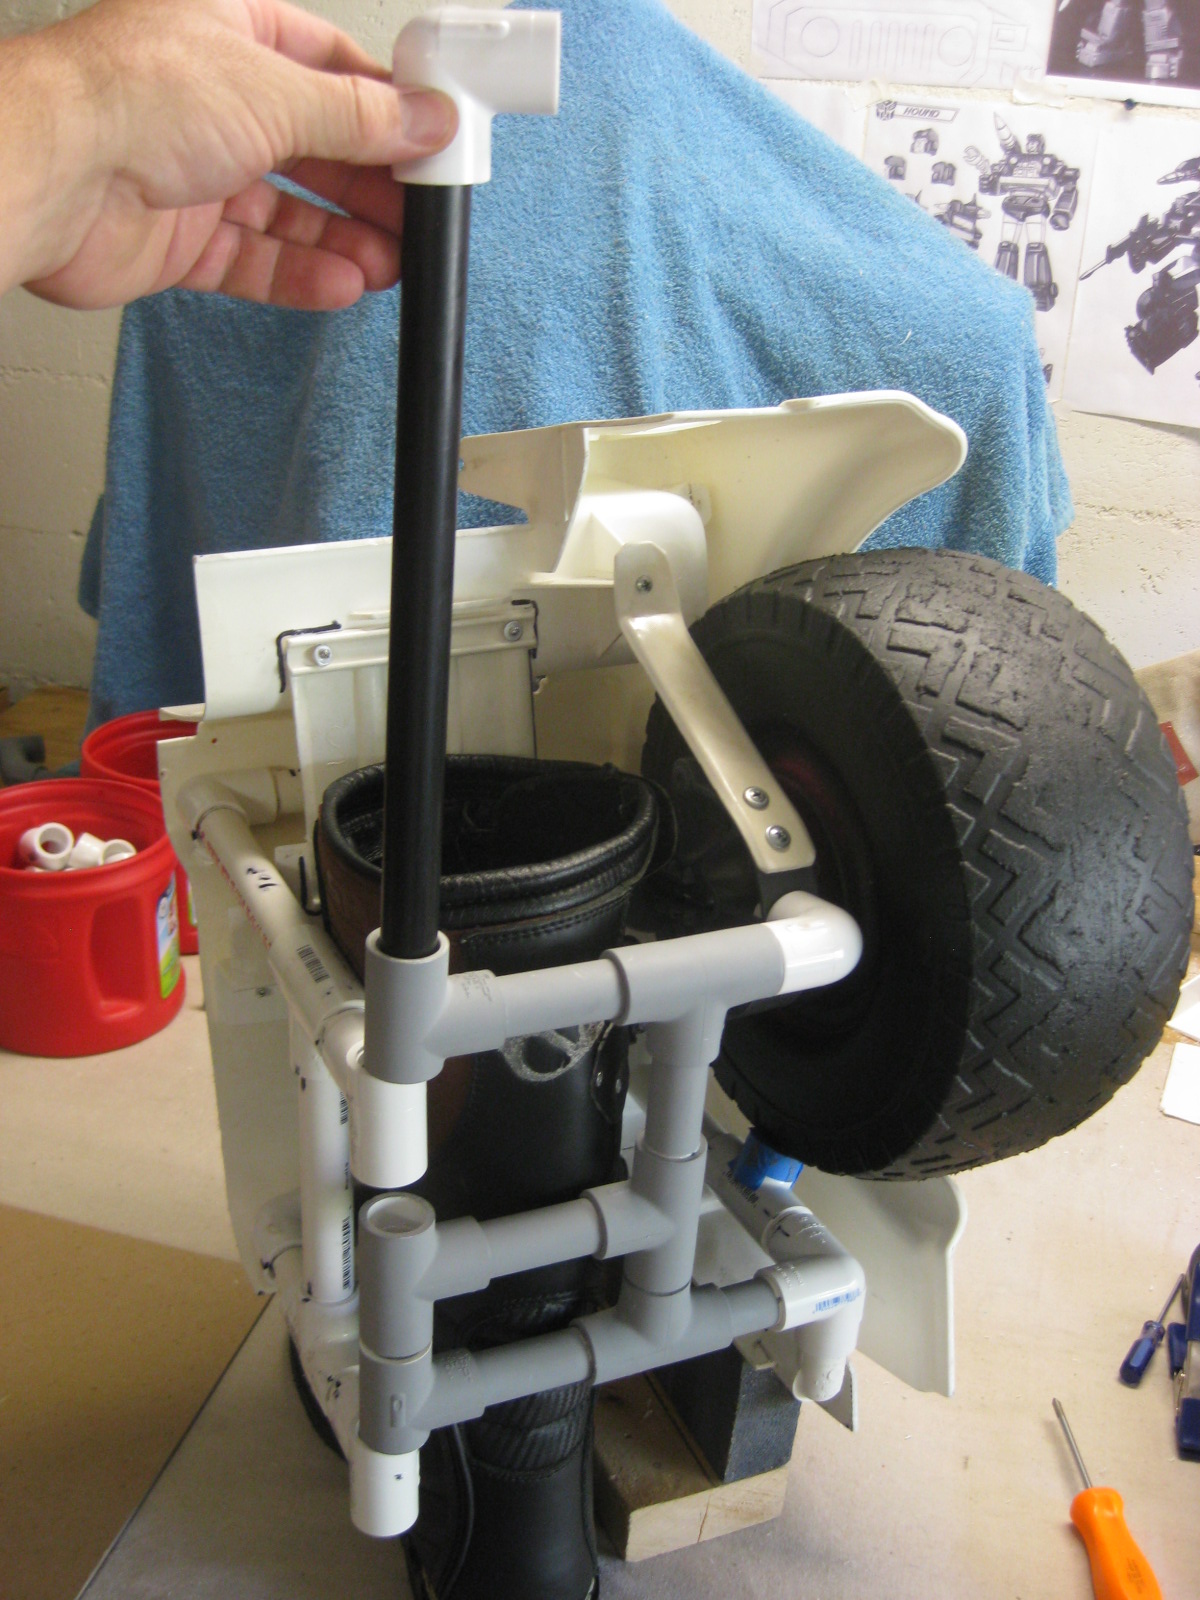
All day Saturday I worked on trying to finalize the PVC frame support around boots.
Many alterations and testing walks wearing boot, also to mention getting it on and off procedure.
I had to make the wheel fixed in place for mounting purposes.
More than half of the entire shroud weight around the boot is heavy to one side, so I had to affix the PVC frame directly to boot in order to balance it.
So far the entire assembly has a few pieces that completely remove to get my foot in and out of boot.
The lower bracket holds most of the weight of frame balance, and also an upper screws directly through boot into the PVC.
First the tire mount bracket connects...
Then a PVC frame connects to tire bracket in addition to a lower PVC coupling.
Last piece is a connector pipe that slides through PVC couplings to secure frame.
Because of off-balance weight during alterations, I made a simple wood block stand that helped a lot.
The cardboard cutouts are for measuring the outer covers, not sure yet if I am going to use vinyl sheet board or just thin storage bin plastic.
Heroes-con Charlotte 2015 was amazing.
Huge event, reminded me of San Diego Comic Con when it started running at the Marriott Convention Center.
Rows of Artists alley's and vendors.
Found some good collectible Transformer figures.
Had a lot of compliments on Prowl suit.
Massive turn out for cosplay at Heroes-Con, a lot of great costumes, it was awesome.
We already purchased tickets for next year.
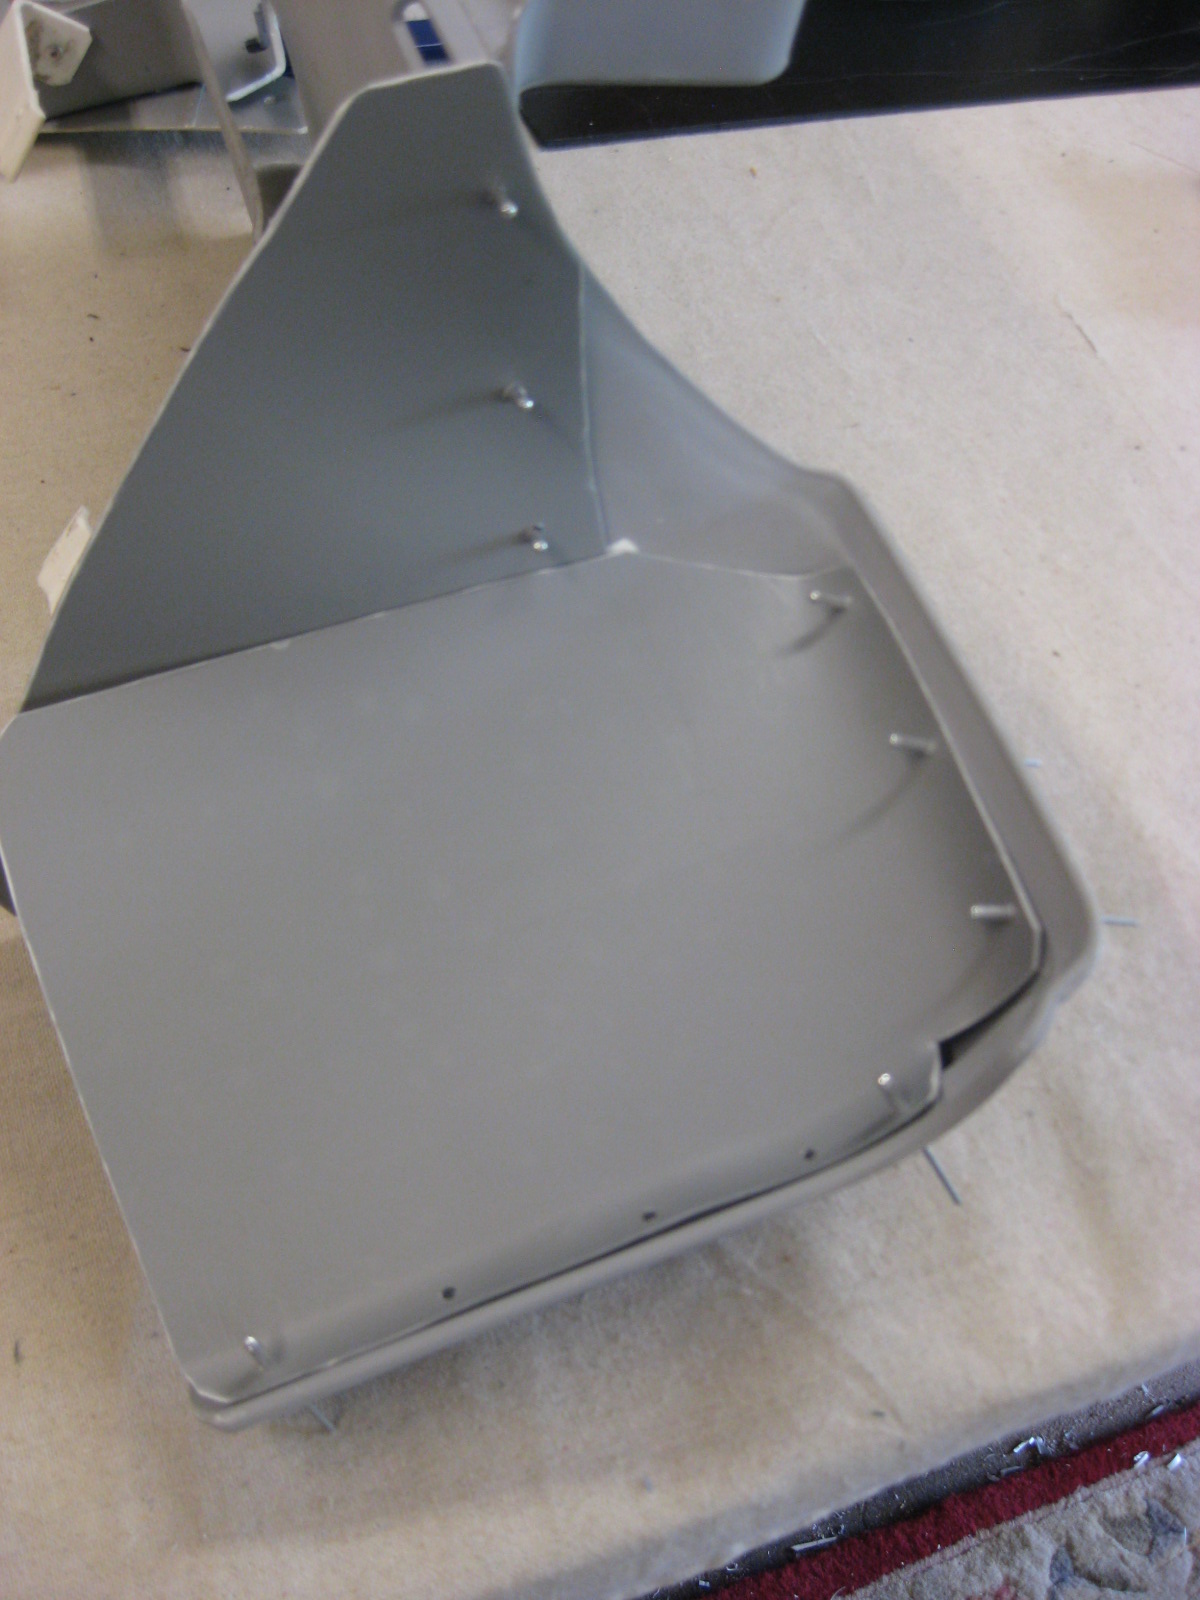
Back assembly is near to completion.
Majority of parts have final paint and clear coat.
Riveted finalized painted parts to back bracket.
Temp attached tire to back assembly to see what final result will show.
Did my best to match spray paint to the green storage bin plastic.
Finished fitted the pieces under the chest fenders.
I pre-cut the shapes with cardboard, then use that as a template when cutting storage bin plastic.
Warm the pieces with heat gun, clamp in place while trimming to fit, mark and drill holes for rivets, let pieces cool while held in place with rivets.
These pieces will be riveted on last, after the final outer spray paint and clear coat is applied.
Decided to use a larger funnel for headlights.
Had to cut out more of grill for new funnel size.
Going to look for a mirror reflective sheet to cut and line the inside of funnels.
Continued working on shoulders and upper arms.
Stitched elastic strap with Velcro onto arm piece and riveted on outer plastic shroud.
Attached right shoulder shroud by nylon strap.
Again I had to notch hood to fit shoulder movement.
Found some handy aluminium washers designed for rivets at hardware store, decent price too.
The second shoulder shroud assembled much easier with rivet washers.
Took a 90° angle plastic piece, cut notches on one side, warmed it with heat gun, curved into place, placed one center rivet, let cool.
Then continued around remainder notches, warmed the last tabs again, finished last rivets and let cool.
Final result turned out perfect.
The Autobot logo on side will look cool, white or red color?
So I completed both sides of shoulder and upper arms and did a test wearing it, my mobility so far is good, and should be good with chest fenders and hood attached.