This past weekend I worked on the forearm sleeves and gloves.
Last year I crafted some prototype forearm sleeves for Prowl to replace the hard plastic ones, but never continued.
So I used them for Hound.
The base sleeves are made out of camping foam mat, easy stuff to cut and hot-glue gun together.
Over the base sleeves I used the mat foam from hardware store.
This is my first time using this grey foam.
I got two different types ; 1/2 thick and 1/4 inch thick.
Tricky at first to work with, especially the angle cutting.
Used contact cement to glue.
I glued a piece of elastic to fit around my wrist on the inside of sleeves, used hot-glue gun to secure.
Might use Plasti-Dip spray for outer color coating, running a few spray test pieces first.
The gloves I knocked out quickly.
Mirrored the gloves I did for Prowl, minus the finger pieces.
I might finish finger pieces when I have more time.
After a few minor adjustments, the belt is completed.
Fits comfortable and feels lighter than the belt I made for Prowl, maybe less vinyl board material.
I also started on the holster for gun.
Something quick and simple, cut out the bottom corners of storage tote plastic and riveted together.
Heat gun came in handy again to curve the pieces together.
Used a few foam cut-outs for inside holster where gun rests to avoid scratches. Gun holsters smooth and snug, the side of gun is tote bin plastic so I'm not worried about scratches.
Next is to attach holster to belt and make a leg strap.
All belt pieces are fitted, glued, painted, and clear coated.
Later this week I can assemble and complete belt.
Also finished the back plastic plates.
Started on belt past few days.
Going to use same model as Prowl belt.
Camping pad foam inside a cloth material sleeve, that is bolted/screwed to vinyl board pieces.
The vinyl strap with belt clip is threaded in between the foam pad and connects in back.
Using grey as the base under-cover color as it matches the tote bin color grey.
This is the Hound G1 concept I am modeling belt design from.
I might even leave a space for the Autobot logo.
Post #100 !!!
After attaching the front grill and placing decals, the main torso assembly is done !
It was easier to solder the headlights wiring before attaching grill, a few had to be done after.
The shrink tube was easier to work with using a heat gun rather than gas torch.
Always double check your connections before final solder.
The Army Star decals turned out exactly as I hoped for on front fenders.
Also finished gluing on the left boot soles.
Trimmed the excess and sprayed a flat black.
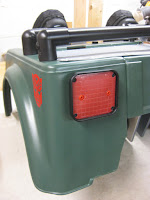
Both lower leg pieces are assembled. Tail-lights and decals placed.
Did a quick walk around with both legs completely assembled, I am pleased with results.
Yesterday I was tinkering with cardboard to get a basic idea on Helmet construction.
This is a compilation of the past week and weekend.
Completed the front torso abdomen, used grey tote bin plastic riveted to the chest plate.
Final clear coat on both leg fenders.
Attached grey cover plate and the black roll-bars.
Assembled the right boot with leg fender and tried it on for a few minutes.
On the chest assembly fenders and hood, I did added some clear packing tape where the two will be touching, similar to what I did on Prowl's hood.
Then I attached the Jeep hood clamps. These are new hood clamps I ordered online at a Power-Wheels parts distributor, glad they came in color grey.
This upcoming weekend will focus on attaching the front grill with headlights and getting the entire chest fender assembly completed.


