Sunday, August 9, 2015

Gun , Boot Sole, and Painting

Gun for Hound 
Hand Weapon is completed.  Turned out awesome.
Used the Nerf Strongarm N-Srike Elite pistol.


Taped off the handle for two reasons, one - I liked the original color already there, two - because this the gun grip, keeping it original means less fading from gripping the handle.


For some reason the clear coat spray reacted weird on the metallic spray paint coat I did, it wanted to chemically strip the paint, weird.  So no clear coat, bummer.
Kept the barrel nozzle and trigger the original orange, kinda like it and there will be no issues or questions regarding it at conventions.
I made a plastic shroud to cover the ammo cylinder and rivet in place, turned out better than planned.  


The slide I painted black with clear coat and screwed it in place,using a black screw cover to hide the screw.


Boot Sole
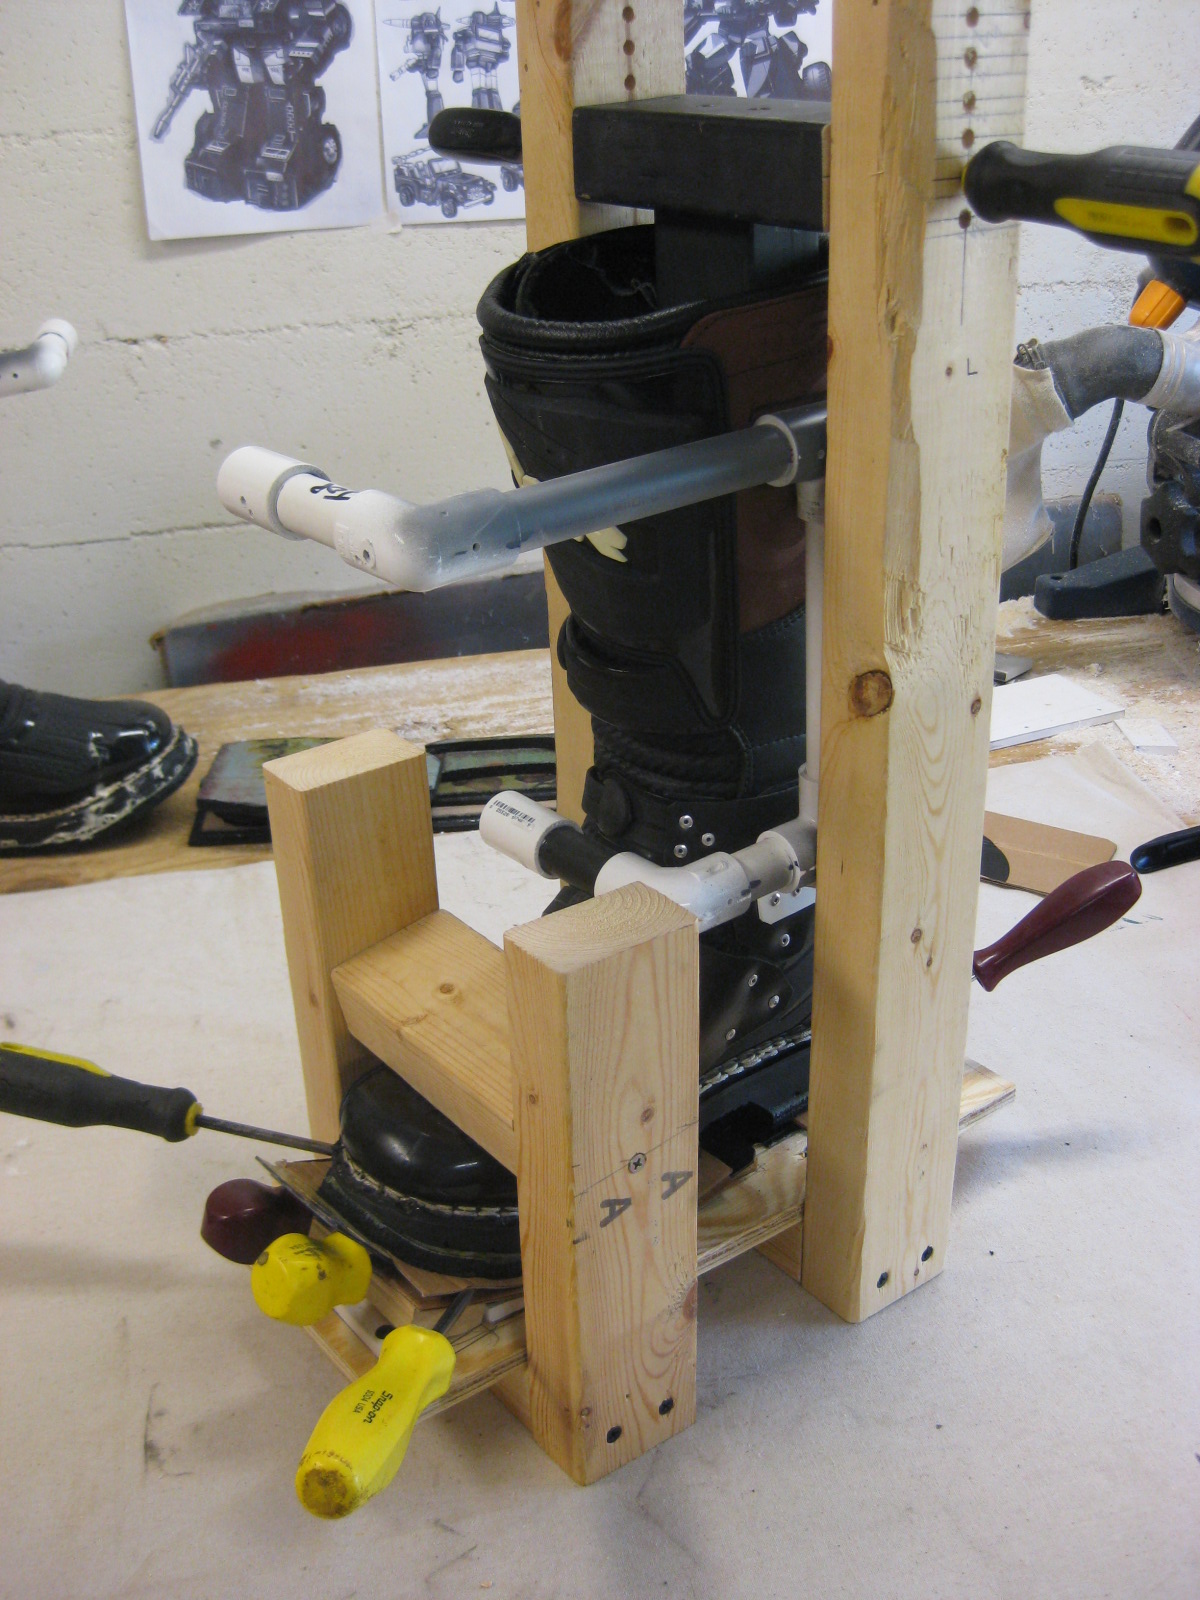
After I glued on that first rubber sole to boot last weekend, I realized the upcoming difficulty of clamping on more as the sole got thicker in height.  So I crafted a make-shift frame around the boot that would enable me to add rubber sole pieces with applied clamped steady pressure.  Started with the other boot and used the contact cement on the first layer of soles.  Tomorrow I will remove boot to check results.


Fenders & Hood
I also sprayed a coat of green on both lower leg fenders.  I will have to do a second coat of green, noticed too many deep scratches and sand marks.
Also did a final clear coat on hood.


Headlights
Decided to just spray the inside of headlight funnels a chrome color spray paint instead of trying the reflective paper.


Thursday, August 6, 2015

Decals & Boot Soles

Received decals in mail today.
Thank you FastDecals.com
The Army star decal is going on each fender.
Larger Autobot decal is center hood.
Smaller ones on leg fenders and shoulders.


Last night I started cutting up a rubber welcome mat from hardware store, for adding some height to boot soles.
Gorilla Glue was a bit messy so I will try contact cement next.
Clamping was kinda awkward but worked.  
The glue residue will be covered with either black or grey plastic bin cover plates.
Trying for at least a one inch gain on boot sole with maybe a 2 inch heel.


Sunday, August 2, 2015

Productive Weekend

Back assembly completed.  Mounted the tires and riveted a couple more pieces.


The torso assembly so far looks great with chest and hood temp attached.  The hood will attach by the Jeep clamps on top of fenders, and by the strap clips I added above shoulders.  The male clip is riveted under hood and the strap length is adjustable for fitting.
I fitted a cover piece for over the vinyl strap clip.


Riveted on the underside panels to the chest fenders, few paint scratches from rivet gun, touch up later.


Continued on lower Leg fenders. 
Pieced together the folded roll bars on each leg and painted black.  


Both inner side panels are done and ready to rivet onto PVC boot frame. Going to do attach them last after paint and final clear coat on fenders.


Fitted the cover panel, cut out of storage bin plastic, and ready to rivet after paint job.


Started the headlights for the grill.  Found reflective paper sheet at craft store to line the inside of cone.  Made a paper cut-out template first for reflective paper.
LED bulb fits good.  
I have all the necessary parts ready for headlights, wires, LED's switch, resistors, shrink tube, etc. 


Sunday, July 26, 2015

Hound - Painted Hood and Chest Fenders

Sanded, primer and painted while weather was clear today.
Sanded hood and fenders with 400 sandpaper before green coat.
The newspaper is covering an area of black I spray painted a few weeks ago that will be covered by grill.
Let first coat of green dry for an hour then did a second coat.
I will do the final clear coat later this week.
Time to order my decals soon.


The front bumper and grill I sprayed with dark grey and then a final clear coat.


Also riveted the back assembly onto the motocross harness.


Saturday, July 11, 2015

Hound - Left Boot cont.

Finalized the PVC frame for left boot, and then started measuring and cutting vinyl panels to rivet onto frame.
Also did a test walk around wearing both boots assembled with frame and wheels.

This side panel on boot frame I had to use two pieces side by side and rivet together.
This will get riveted directly to PVC frame after painted.


The back panels turned out great with final clear coat.
I went with the dark grey color for the boot panels.